
.png)
How to Add Products to Shopify: A Step-by-Step Guide

Adding products to your Shopify store is a simple process that enables you to showcase your inventory and reach potential customers. Whether you're looking to bulk add products or add products to specific collections, Shopify provides a user-friendly platform to manage your eCommerce catalog effectively.
If you're seeking innovative ways to enhance your Shopify experience, consider exploring tools like Manifest AI, a GPT-powered AI Chatbot designed to assist e-commerce brands.
How to Add Products to Shopify
Check the below steps on how to list products on your Shopify Store:
Step 1: Access Your Shopify Admin
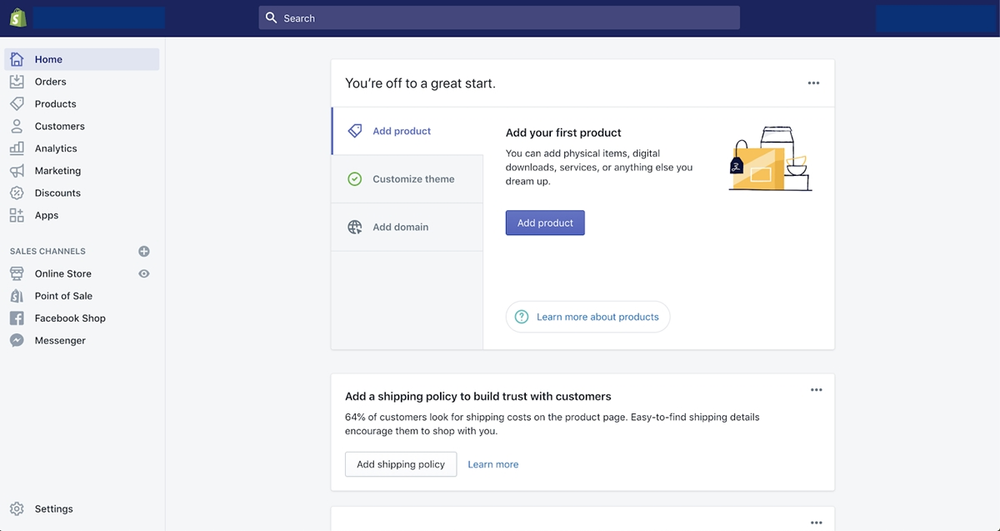
Begin by logging in to your Shopify account to access your admin dashboard, where you can control your online store's settings and content.
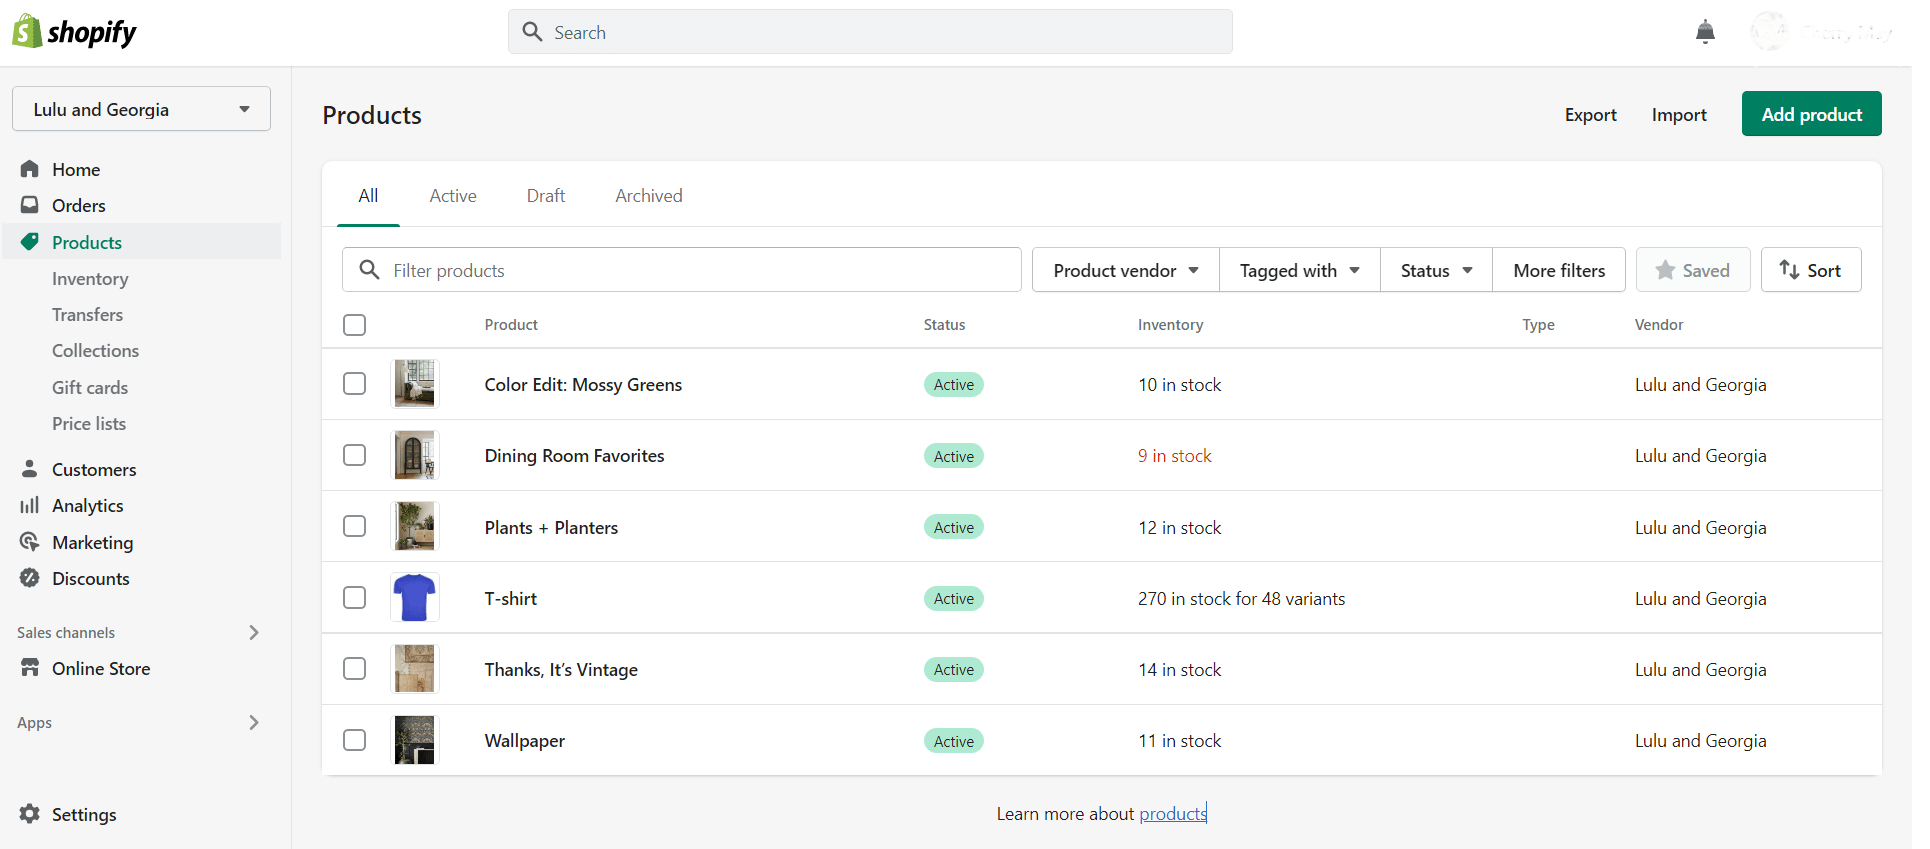
Step 2: Navigate to the Products Section
Upon logging in, you'll find a navigation menu on the left-hand side of the dashboard. Locate and click on the "Products" section.
Step 3: Add a New Product
Inside the "Products" section, you'll immediately notice the "Add product" button. This is where you initiate the process of adding a new product to your store.
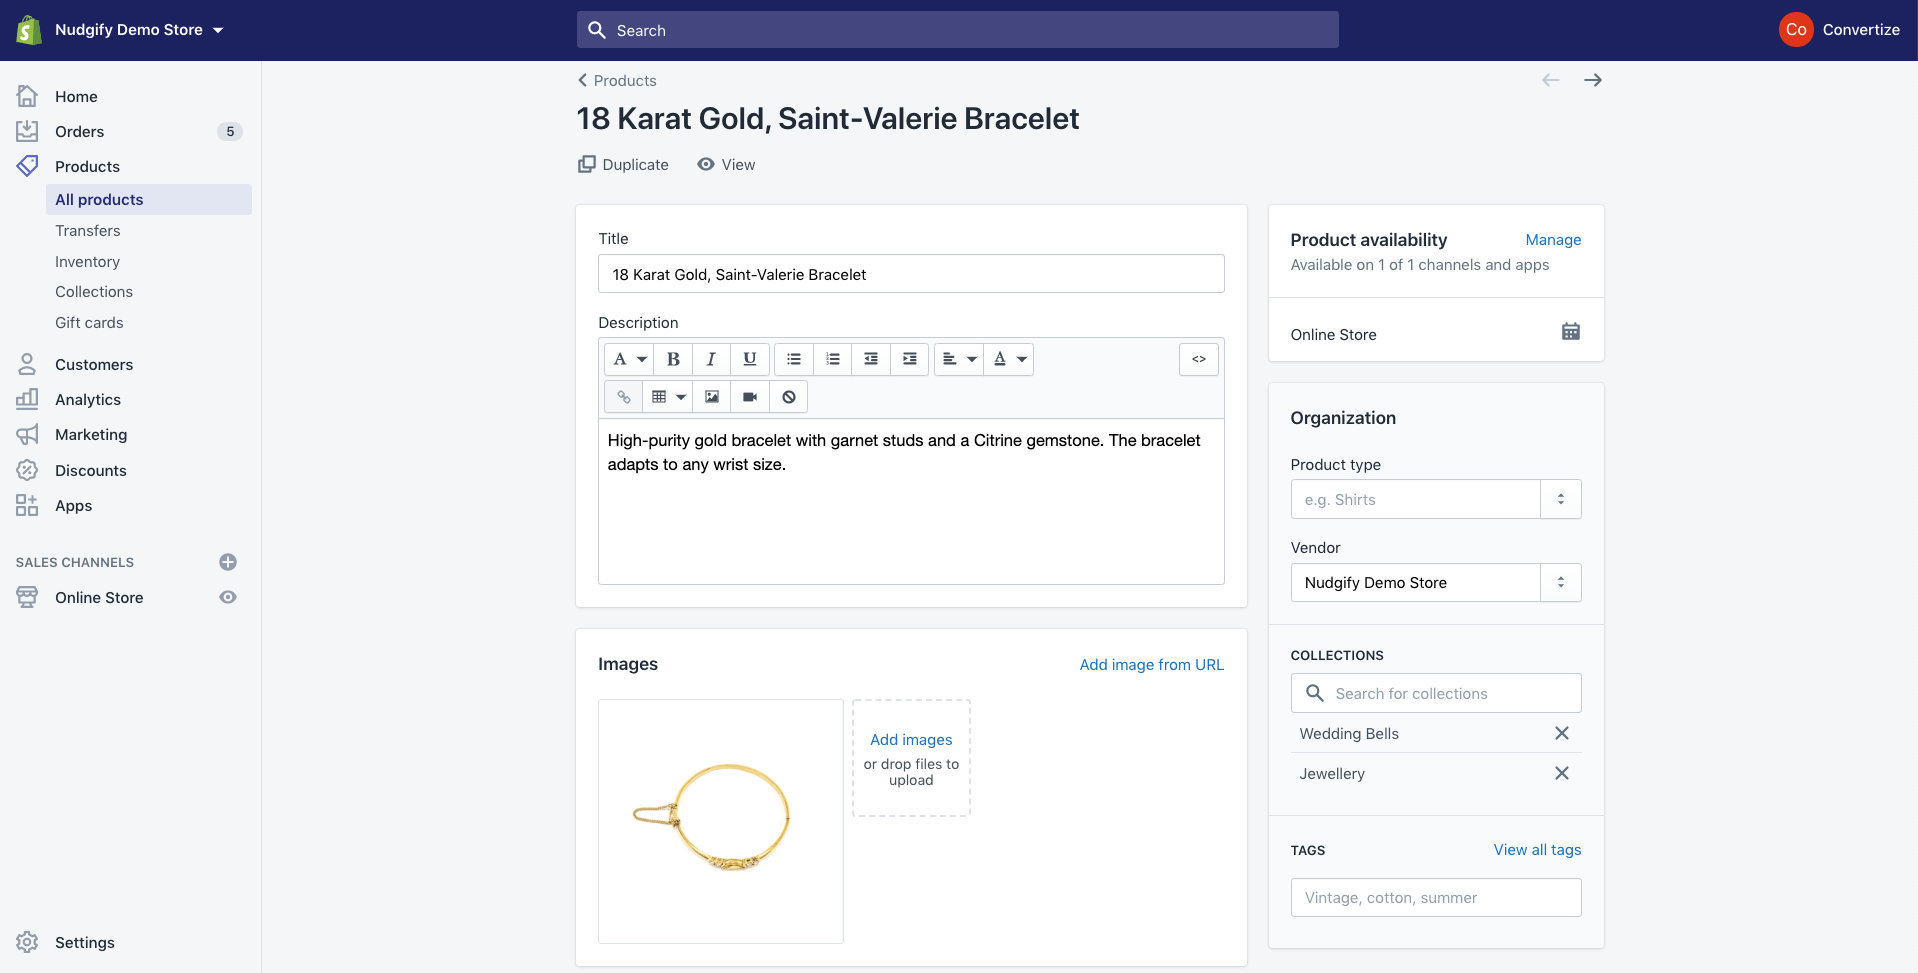
Step 4: Enter Product Details
Here's where you can dive into the specifics of your product:
- Product Title: Begin by entering the name of your product, using clear and descriptive language.
- Description: Craft a detailed and compelling description that highlights the features and benefits of your product. Feel free to use formatting, images, and even embedded videos to enhance the presentation.
- Images and Videos: Upload high-quality images and videos that effectively showcase your product from different angles. Visual content is crucial for capturing the attention of potential buyers.
- Pricing: Set the product's price, and if applicable, you can also set a compare-at price to emphasize any ongoing sale.
- Inventory: Indicate the quantity of the product available in stock. This step is especially important if you plan to enable inventory tracking.
- Shipping: Configure the weight, dimensions, and available shipping options for your product.
- Variants: If your product comes in various options (e.g., sizes, colors), add them under the "Variants" section. Include corresponding prices, SKUs, and inventory management for each variant.
- Collections: Organize your product by assigning it to relevant collections or creating new ones.
- Tags: Enhance discoverability by adding relevant tags that reflect the product's characteristics.
- Search Engine Listing Preview: Optimize your product's title, description, and URL to improve its visibility on search engines.
Step 5: Organize and Categorize
In the "Organization" section, you can categorize your product by placing it in appropriate collections and adding relevant tags. This helps customers find your product easily.
Step 6: Inventory Management
Under the "Inventory" section, you can effectively manage your product's stock levels and enable notifications for low stock quantities.
Step 7: Pricing
In the "Pricing" section, set the product's price and compare-at price (if applicable). This section also enables you to implement dynamic pricing for specific customer groups.
Step 8: Shipping
Configure shipping details such as weight, dimensions, and shipping options in the dedicated "Shipping" section.
Step 9: Variants (if applicable)
If your product offers different variations, manage them within the "Variants" section. Specify prices, SKUs, and track inventory for each variant.
Step 10: SEO Optimization
Under the "Search engine listing preview," optimize your product's title, meta description, and URL to enhance its visibility on search engines like Google.
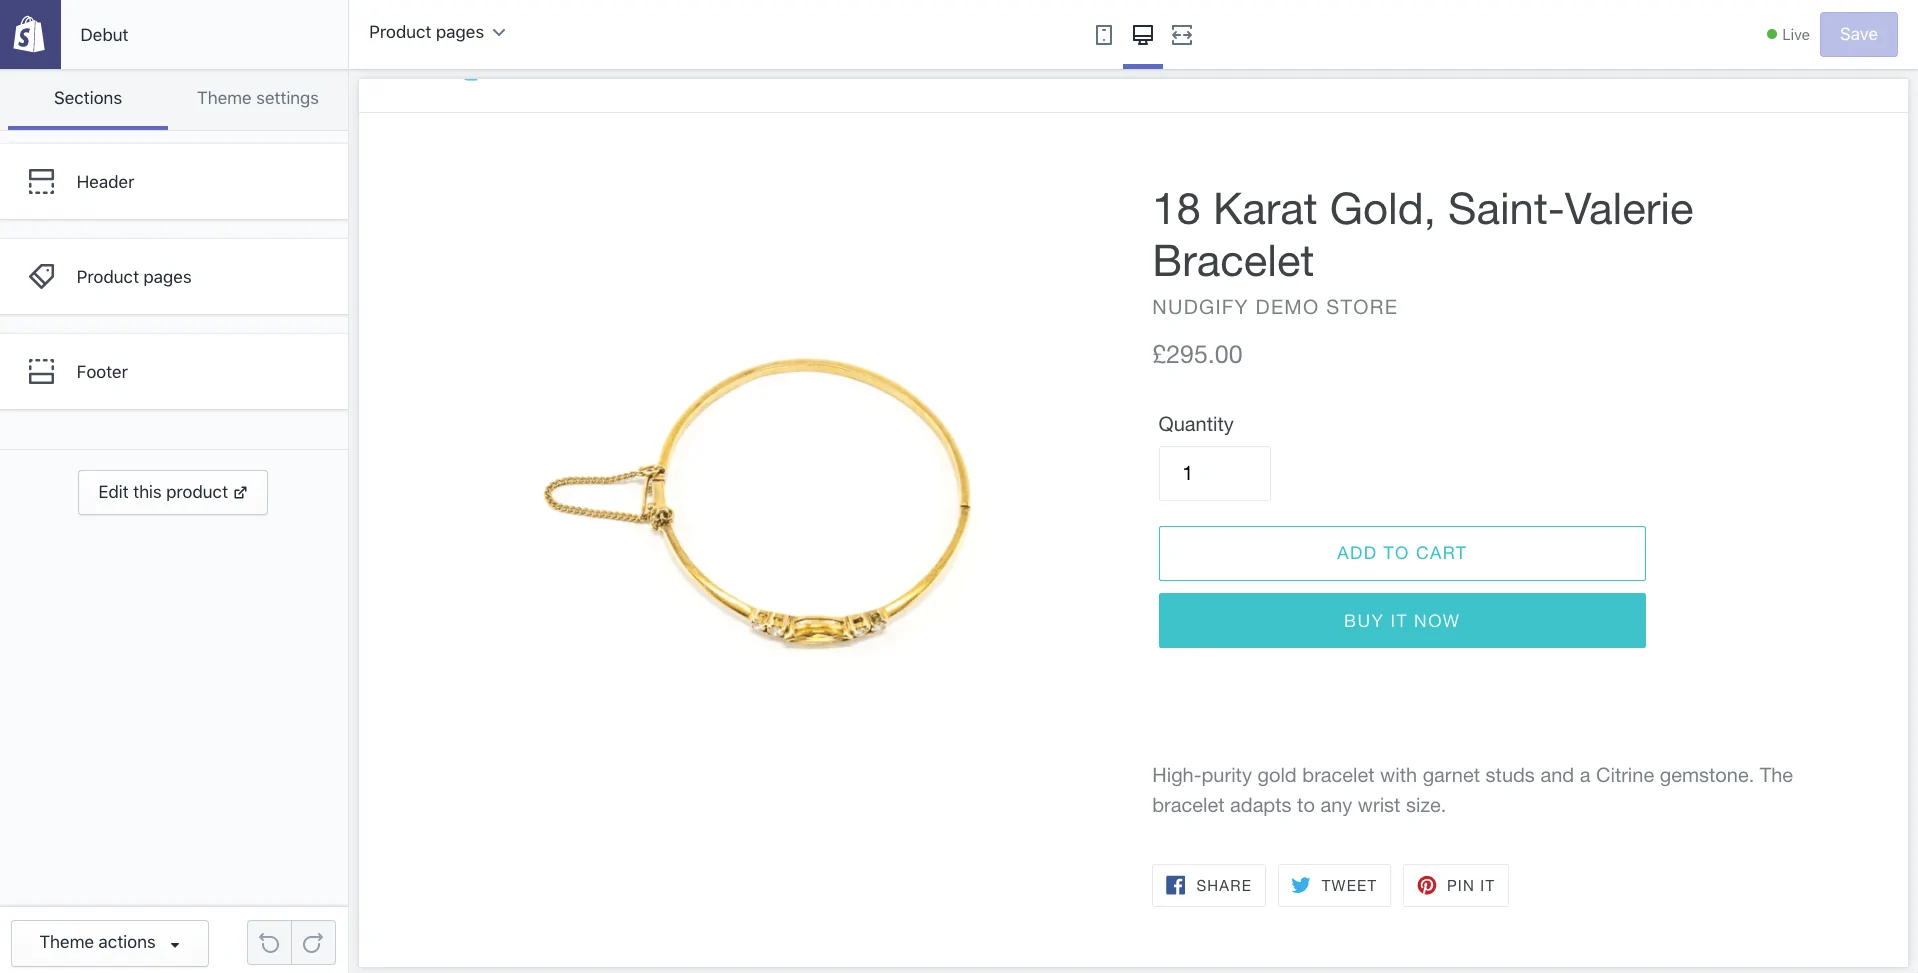
Step 11: Save and Publish
Finally, after inputting all necessary information, click the "Save" button to retain the product as a draft, or choose "Save and publish" to make it visible and available for purchase on your store.
By following these steps, you can seamlessly add products to your Shopify store, whether you're looking to incorporate Shopify add-on products, perform bulk product additions, or efficiently list Shopify products in specific collections.
How to Import Products to Shopify from Other Websites
Importing products to Shopify from other websites can be a powerful strategy to quickly populate your online store and expand your product offerings. Follow these steps to import products and streamline the process effectively:
- Choose App: Install a reliable app like Oberlo, Spreadr, or Importify.
- Connect Store: Grant app access to your Shopify store.
- Select Products: Browse the source site, and choose products.
- Customize: Edit details to match your brand.
- Bulk Import: Add multiple products at once.
- Optimize: Review, and adjust descriptions, images, and prices.
- Set Collections: Organize products into categories.
- Review and Publish: Preview and adapt as needed.
- Inventory and Variants: Set variants, and manage stock.
- Configure Payments and Shipping: Align with products.
- Test Order: Ensure a smooth process.
- Launch and Monitor: Go live, and adjust for success.
How to Import Products with CSV Files on Shopify
Importing products using CSV files in Shopify is a convenient way to add multiple products quickly. Here's how to do it:
- Prepare Your CSV File: Create a spreadsheet with columns for product details like title, description, price, SKU, etc. Use Shopify's CSV template or your own.
- Access Shopify Admin: Log in to your Shopify account and access the admin dashboard.
- Navigate to Products: From the dashboard, click on "Products" in the left-hand menu.
- Choose Import: In the Products section, click on "Import."
- Upload CSV File: Select your prepared CSV file and upload it.
- Map Columns: Match your CSV columns to Shopify's fields. This ensures correct data placement.
- Review and Import: Preview the products and their details. Make sure everything is accurate.
- Import Products: Once you're satisfied, click "Import."
- Monitor Progress: Shopify will process your import and provide updates on its progress.
- Review and Adjust: After importing, review your products. Edit descriptions, images, and other details if necessary.
Conclusion
Adding products to your Shopify store is a fundamental step in establishing a successful online business. With user-friendly features and versatile options, Shopify empowers you to showcase your inventory effectively. Whether you're importing from other websites or using CSV files, the process is streamlined and accessible. Remember to optimize your product details for SEO, organize products into collections, and ensure accurate variants and inventory management. By following these steps, you're not only populating your store but also enhancing the shopping experience for your customers. Start building your curated online catalog today and embark on your journey towards eCommerce success with Shopify.