
.png)
What are Chat Triggers: Types & How to use Chat Triggers
Chat triggers are automated responses or actions initiated when certain conditions are met in a chat interface. This blog will explore the different types of chat triggers and how they can be effectively utilized. From triggering a greeting when a visitor enters a site to sending targeted messages based on user behavior, chat triggers can significantly enhance the efficiency of customer interactions. Understanding and implementing these triggers can lead to more personalized and timely responses, improving the overall user experience. Whether you're new to chat functionalities or looking to refine your strategy, this guide offers valuable insights into the world of chat triggers.
What are Chat Triggers?
Chat triggers are specific conditions programmed within a chat system to automatically initiate certain responses or actions. They play a crucial role in digital customer service and engagement, offering timely and relevant interactions with website visitors. For instance, a chat trigger could be set to welcome users as soon as they visit a website or to offer assistance if they seem to be spending a long time on a checkout page. These triggers can also be customized to respond to specific user behaviors or inquiries, enhancing the efficiency of the chat service. The primary goal of chat triggers modules is to provide immediate, tailored chat engagement, helping to improve the user experience and potentially increase conversions on websites.
Types of Live Chat Triggers
Here are the chat trigger examples:
- Time-based Triggers: These are activated after a visitor has spent a predetermined amount of time on a site or a specific page. For example, if a visitor lingers on a product page for more than a minute, a chat prompt offering more information or assistance might appear.
- Proactive triggers: Proactive live chat triggers automatically initiate conversations with website visitors based on predefined conditions, such as time spent on a page or specific user actions. They aim to engage customers before they reach out with questions or issues, offering assistance and information proactively. This feature enhances customer experience by providing timely support and guidance, potentially increasing engagement and conversions.
- Page-based Triggers: Triggered when a visitor lands on or navigates to a specific page. They are useful for providing targeted information on product pages, FAQs, or during the checkout process.
- Behavior-based Triggers: Initiated by specific actions taken by a user, such as clicking on a product, adding items to a cart, or attempting to leave the site. These triggers are effective in addressing potential doubts or offering last-minute deals to reduce cart abandonment.
- Traffic Source Triggers: These respond to the visitor’s source of traffic, such as a search engine, social media, or a specific marketing campaign. They can provide tailored greetings or offers based on the user’s entry point.
- Visitor Segmentation Triggers: Activated based on specific visitor segments, like new visitors versus returning customers. New visitors might receive a welcome message, while returning customers could be greeted with personalized offers or information.
- Inactivity Triggers: If a user is inactive for a certain period, these triggers can send a message to re-engage them, often used in customer support scenarios to ensure the user’s query is being addressed.
- Purchase History Triggers: These are activated based on a customer’s previous purchases. For returning customers, chat prompts can recommend products similar to what they’ve bought before or offer support with recently purchased items.
- Cart Value Triggers: Triggered when the total value of items in a shopping cart reaches a certain threshold. They can be used to offer discounts or free shipping to encourage completion of the purchase.
- Exit Intent Triggers: Activated when a user shows signs of leaving the site, especially from the cart or checkout pages. These can offer special deals or ask if the customer needs help with their purchase decision.
- Product Interest Triggers: These respond to the amount of time spent on specific product pages or the number of times a product has been viewed, offering more details, customer reviews, or live demos of the product.
How to use Chat Triggers?
Using chat triggers effectively involves a strategic approach to enhance customer interaction and support. Here’s how to implement them efficiently:
- Identify Key Customer Actions: Determine which actions or behaviors by customers on your website should prompt a chat. This could be anything from spending a certain amount of time on a page to clicking on a specific product.
- Set Specific Triggers: Based on these actions, set up triggers in your chat system. For instance, create a time-based trigger for visitors on a checkout page for more than a minute, offering help or answering common questions.
- Customize Trigger Messages: Tailor the messages prompted by these triggers to be relevant and helpful. Ensure they resonate with the specific action that triggered the chat. Personalization can significantly enhance the effectiveness of these messages.
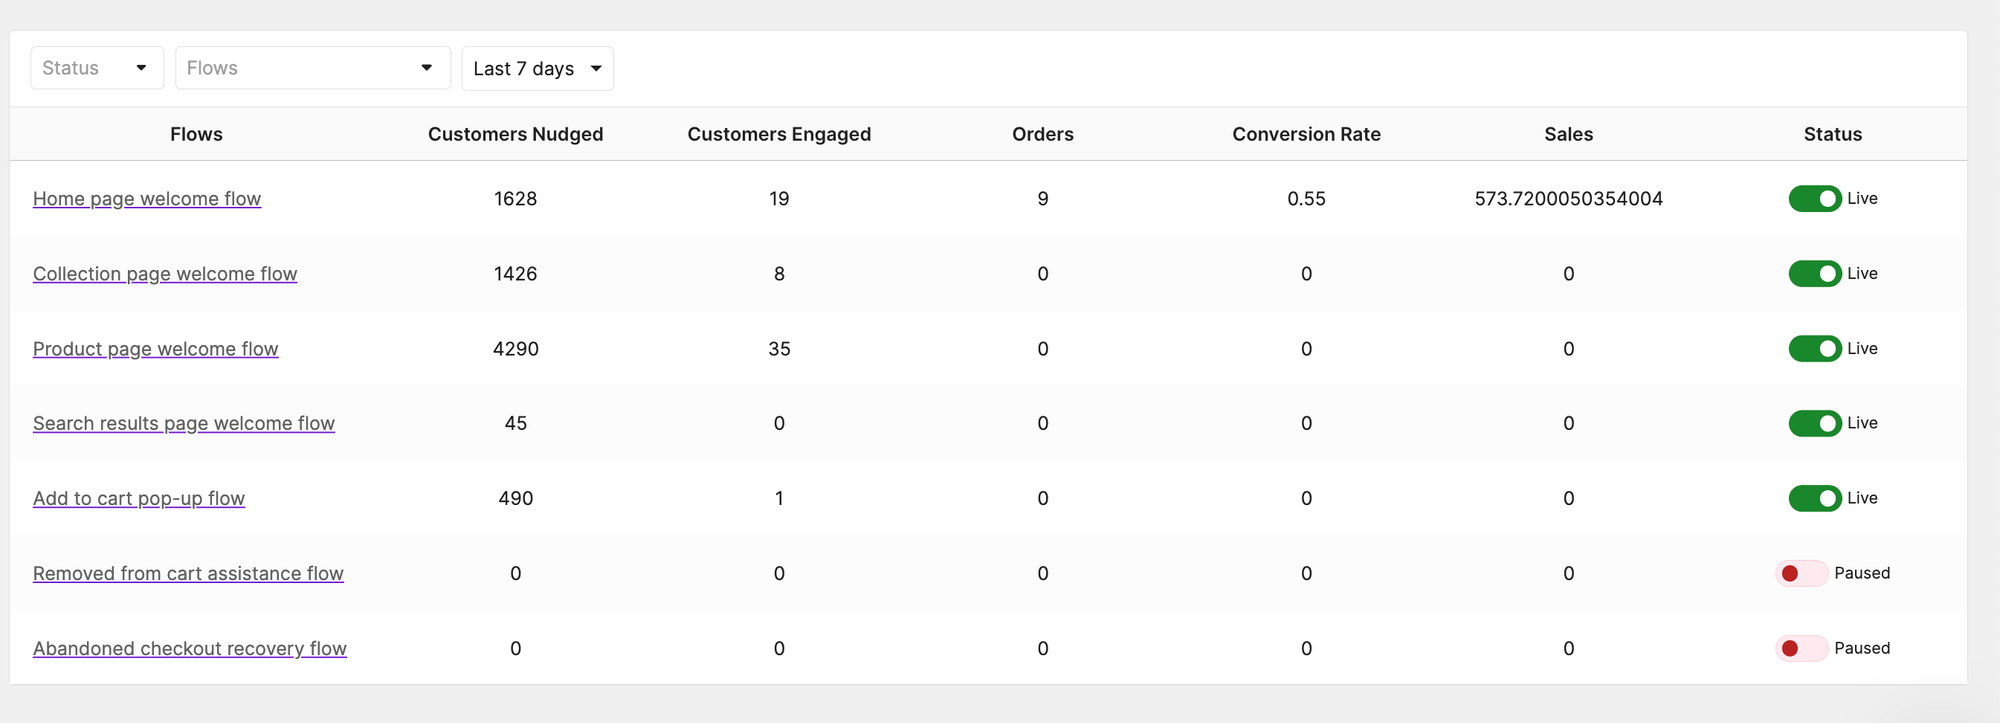
- Test and Optimize: After setting up triggers, monitor their performance. Analyze if they are engaging customers as intended or if they require adjustments. Continuous testing and tweaking can significantly improve their effectiveness.
- Use Triggers Sparingly: While chat triggers are useful, overuse can overwhelm or annoy customers. It’s important to find a balance and use them in a way that genuinely adds value to the customer experience.
How to Install Chat Triggers?
- Install Manifest AI:
- First, log into your Shopify store.
- Go to the Shopify App Store and search for 'Manifest AI'.
- Install the Manifest AI app and then access the Manifest AI dashboard through your Shopify store's apps section.
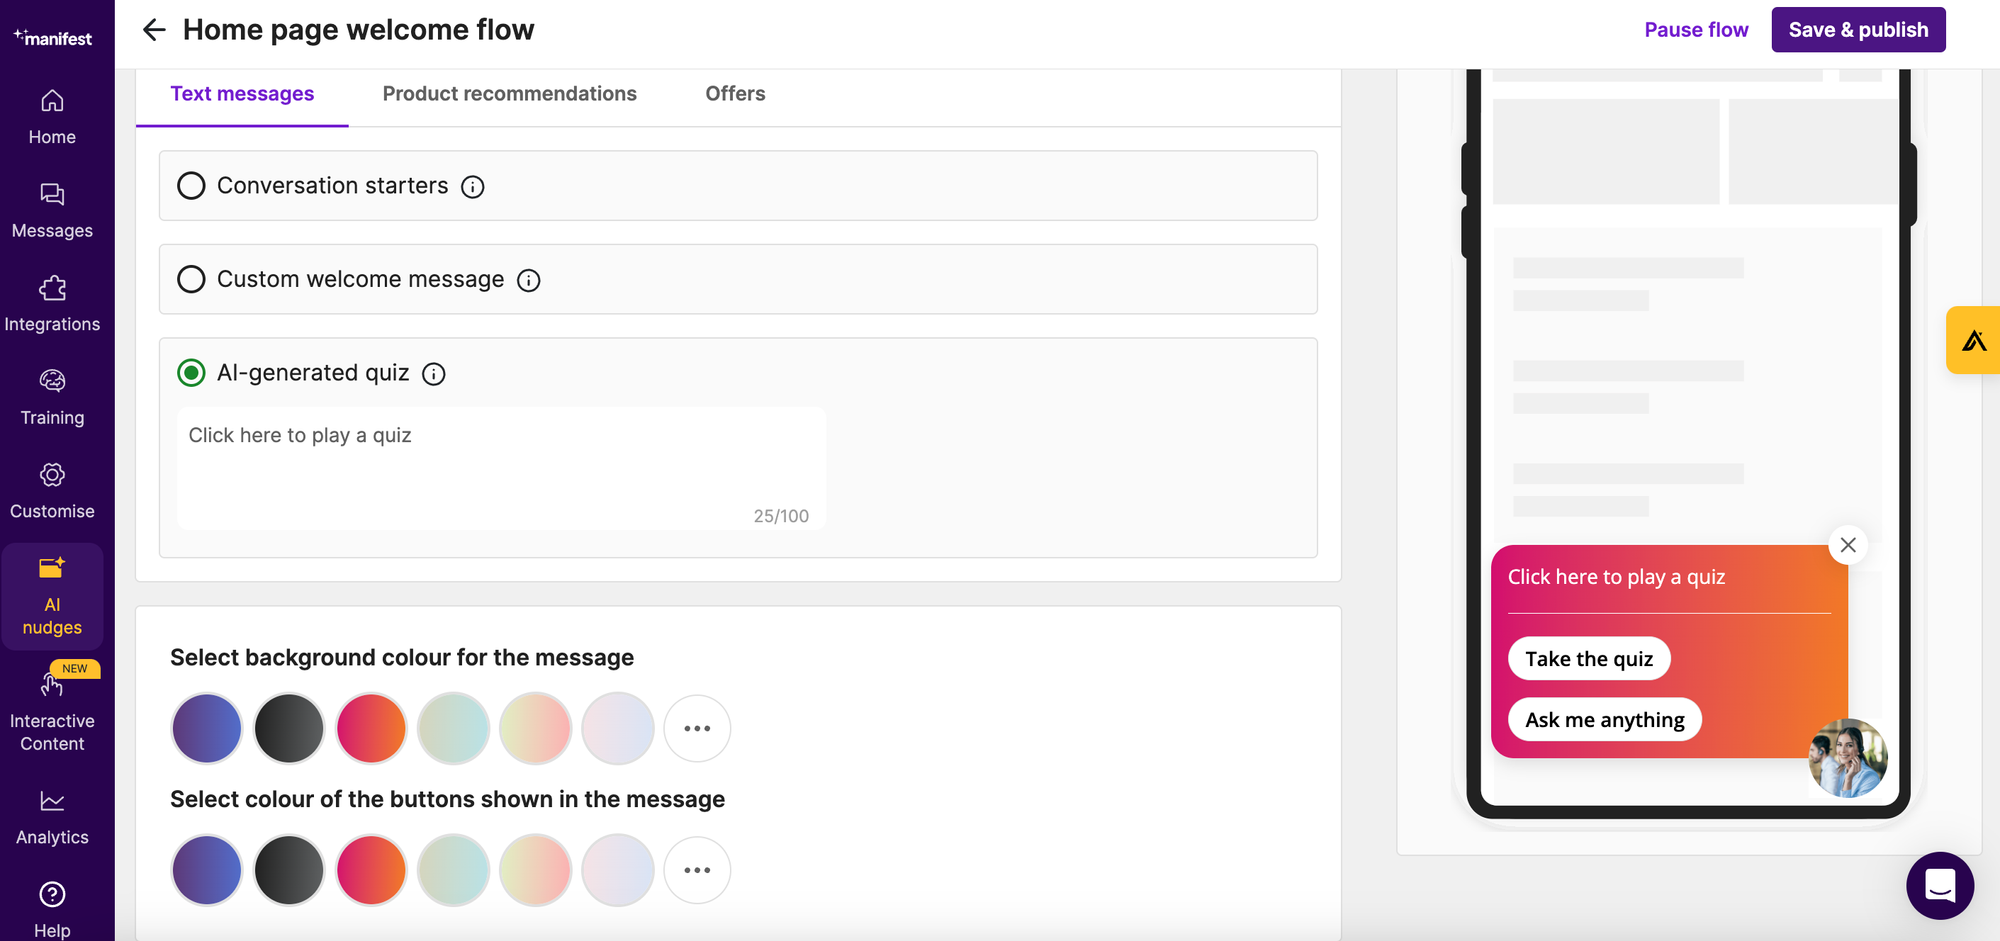
- Navigate to AI Nudges:
- Within the Manifest AI dashboard, find and click on the "AI Nudges" section. This area is dedicated to setting up and managing your chat triggers.
- Select and Activate Triggers:
- In the AI Nudges section, you will see a list of available nudges or triggers, each designed for different customer interactions.
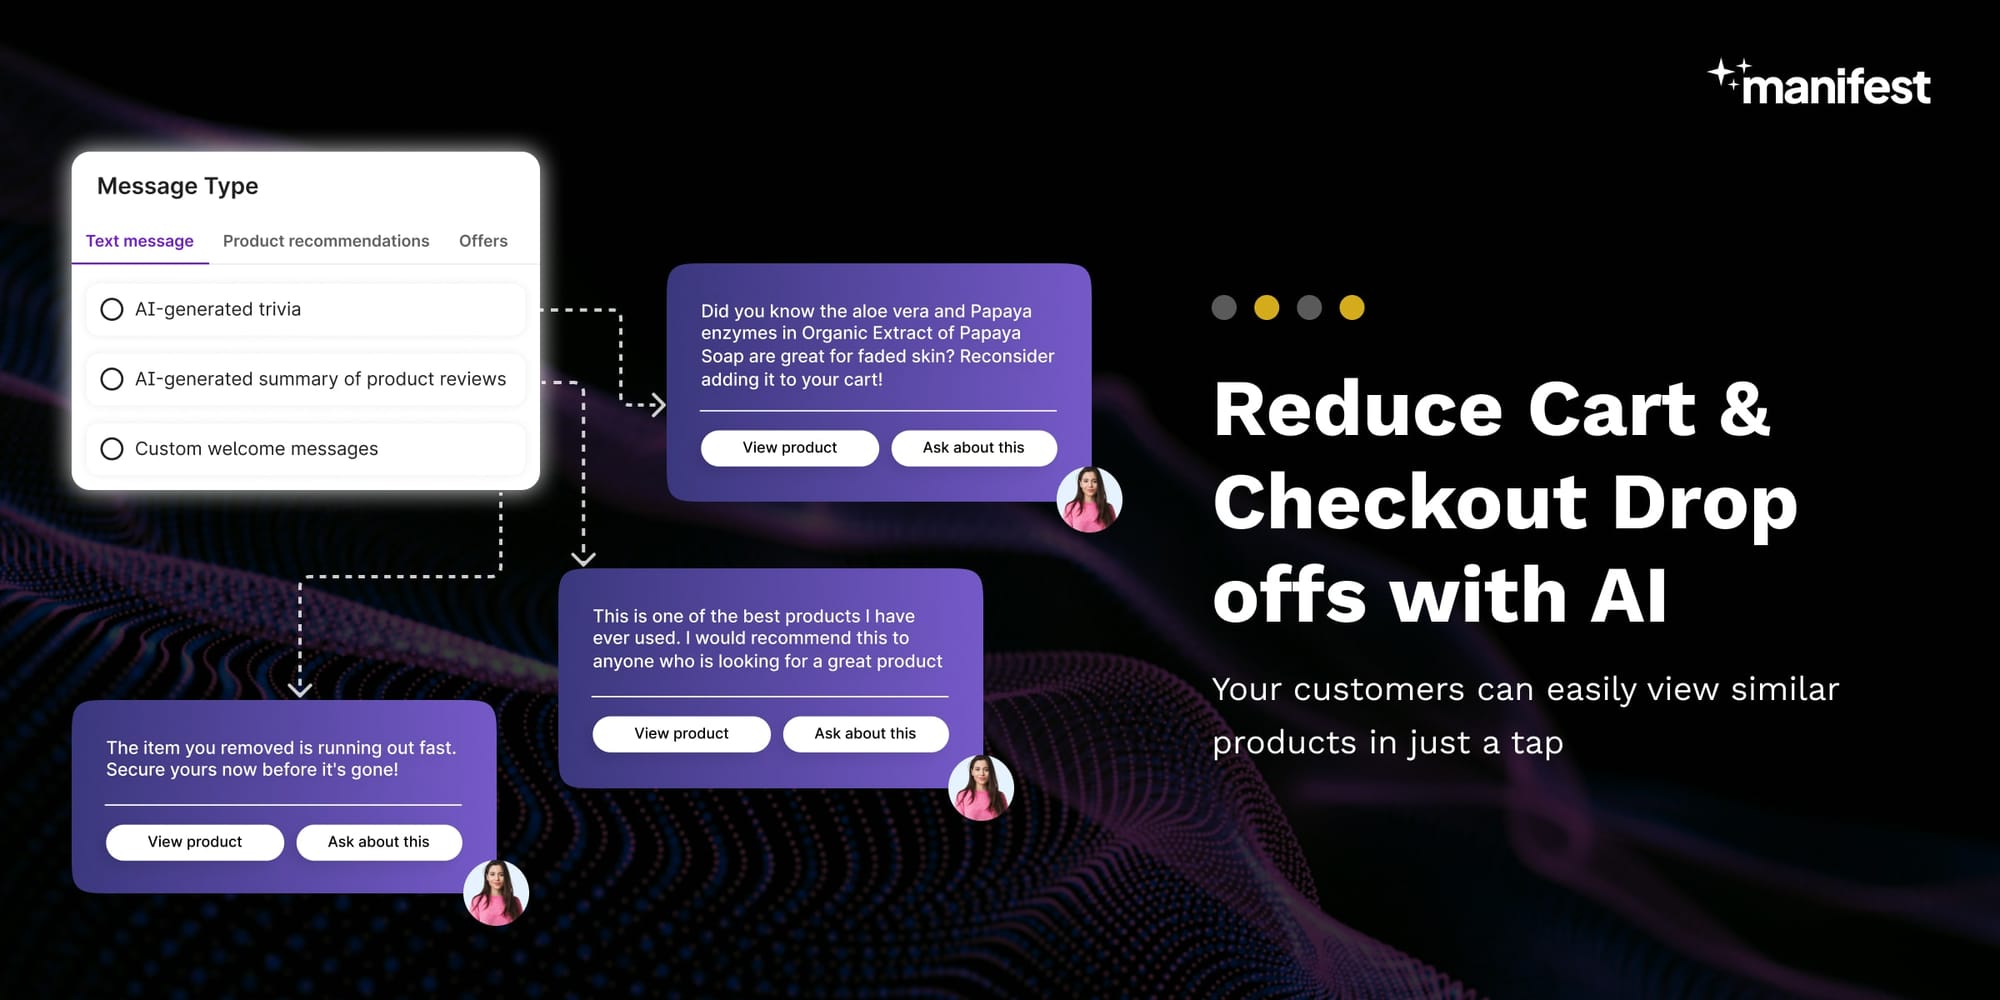
- Choose the triggers that align with your customer engagement goals. You can select from pre-defined options like welcome messages, product recommendations, or support prompts based on user actions.
- Customize the triggers as necessary to fit your store’s style and tone.
- Make It Live:
- Once you’ve selected and customized your triggers, activate them to make them live on your website.
- These triggers will now automatically engage with visitors based on the conditions you’ve set, enhancing the customer experience with timely and relevant interactions.
Conclusion
In conclusion, chat triggers are a dynamic tool in the realm of online customer service, offering automated yet personalized interactions based on specific user behaviors or conditions. Understanding the various types of chat triggers and their appropriate usage is key to enhancing the customer experience on your website. By effectively implementing these triggers, you can ensure timely responses, improved customer engagement, and a more streamlined communication process. Whether for guiding users, providing information, or driving sales, chat triggers represent a crucial strategy in optimizing digital customer interaction, making them an invaluable asset for any online business or platform.